How to make your own amp and speakers
Gadget haberdashers Technology Will Save Us want you to get down and dirty with a DIY kit

If you’ve got £40 to spare and want to learn more about the magic that pushes your tunes beautifully from your laptop/phone/Hi-Fi to your ears, here’s a Sunday afternoon tech project for you.
Technology Will Save Us run tech workshops at Rough Trade East record store in London and it’s about to launch an online store selling everything from DIY Arduino inventor kits and make-your-own-instrument packs. Its producer, Kirsty, took us through some basic tinkering.
Step One – Get some inspiration
Maybe like us, you wouldn’t mind figuring out some of the different components hiding inside your Orange OPC amp or B&W speakers and replicating (kind of) how your high-end sound set-up works. And even though most home gadgets are encased in gorgeous-looking shells, you never know when your beginner’s tinkering could come in handy – some expensive component might pack it in just when you need it.
Step Two – Round up some components
You’ll need a soldering iron (well, what did you expect?) and some protective eye gear. You’ll probably need around 25-30 separate parts to get going, including an integrated circuit amplifier, a PCB, stereo input jack, exciters and plenty of cables, capacitors, diodes and resistors.
You can round the parts up yourself (download this How To manual for the full list) or buy a DIY kit with everything in for £36 from the TWSU kiosk in Rough Trade or online (coming soon).
Step Three – Solder your amp
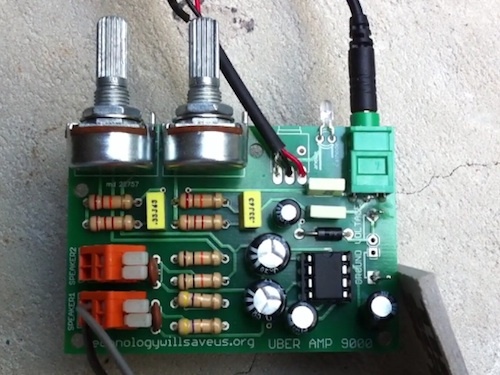
OK, soldering your amp and setting up your ‘speakers’ will take about two hours, so get ready for a proper tech crafts session. Set your PCB down (you’re going to be spending a lot of time together) then bend, insert, solder and trim one diode, an LED, a stereo jack and nine different resistors into place on the board.
Next up, stick your switch next to the LED and (this bit is important) take the 8 pin socket and solder it centre stage on your PCB – this is where you’ll slot in your integrated chip later. There’s also ten capacitors to insert and solder – some are polarised, with different leg lengths, so you can only insert them one way round. The TWSU board has handy + and – signs on. Here’s a video that makes it look really quick and easy.
Step Four – Add connectors, an amplifier chip and batteries
Insert and solder your two terminal block connectors to the board – these will connect via wires to your exciters – and two potentiometers (variable resistors) too. Insert the IC amplifier chip carefully into your 8 pin socket, then solder the battery holder onto the board from behind and test it with 2 AA batteries. Turn the switch and the LED should go on – if not get troubleshooting.
If it’s all good, take the battery holder off and attach some double sided foam tape then unpeel one sticky side. Solder the holder’s legs onto the underside of the board near to the IC then test out the LED again.
Step Five – Choose your speakers
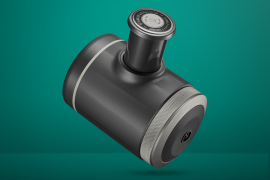
Once your ‘Uber Amp 9000’ is done, attach it to your exciters using two wires per exciter and hooking them up to the terminal block connectors on the amp. If you skipped DIY gadget class, all you need to know is that exciters are small resonating coils that turn any surface into a speaker with their vibrations.
Once you’ve worked that out, just decide where you want to party: a wooden shelf will do nicely but even something like a cereal box will work. Daniel Hirschmann from Technology Will Save Us made this Vimeo vid to show his completed project, using his BlackBerry and some cardboard.
And you’re done – post your DIY gadget tales on the Stuff Facebook page in return for our eternal respect. And sign up for Technology Will Save Us workshops over at the site.


